


Connect Muse to Google Search Console
Connect Muse to Google Search Console: 1. Connect Google Search Console in ApexGenius. 2. Add the ApexGenius connector. 3. Ask Muse.
1,000 free credits · No card required
How to connect Google Search Console to Muse
- 1Sign in to ApexGenius and connect Google Search Console
- 2Add the ApexGenius connector to Muse
- 3Start using Google Search Console in Muse
- 1
Connect Google Search Console to ApexGenius
Choose what it can reach
Pick the accounts or properties your AI may use.
- 2
Connect ApexGenius to Muse
Choose Muse
Back on Start, pick Muse and copy the prompt.
- 3
Add it in Muse
In Muse, ask it to connect ApexGenius. Choose Connect on the card.
- 4
Approve access
ApexGenius opens its approval page. Review the access, then approve.
Add the ApexGenius connector to Muse
Muse adds ApexGenius as a custom connector from inside a chat. There is no config file and no terminal step.
- In ApexGenius, pick Muse on Start and copy the Muse setup prompt.
- In Muse, ask it to connect ApexGenius and paste the prompt. Muse shows an ApexGenius connector card. Choose Connect.
- Sign in to ApexGenius in your browser and approve access.
The MCP address
https://server.autom8.pro/mcp
Check it. Ask Muse which apps are connected. The setup prompt tells it to call apex_search_tools with an empty query and list them.
Then ask Muse
List the Google Search Console properties enabled for me in ApexGenius. Do not change anything.
Written setup, step by stepShow
Before you start
- A Google account with access to an existing Search Console property.
- The exact Domain or URL-prefix property you want to use. You can add a missing property with the connector’s Add property write tool. Verify ownership in Google Search Console when required.
1. Connect Google Search Console to ApexGenius
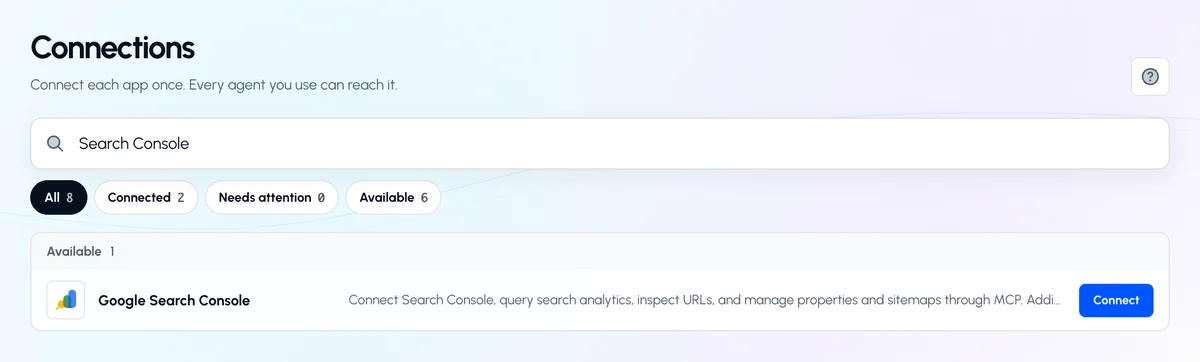
- Open Google Search Console in Connections. Sign in to ApexGenius, open Connections, and choose Google Search Console. Select Connect to begin Google authorization.
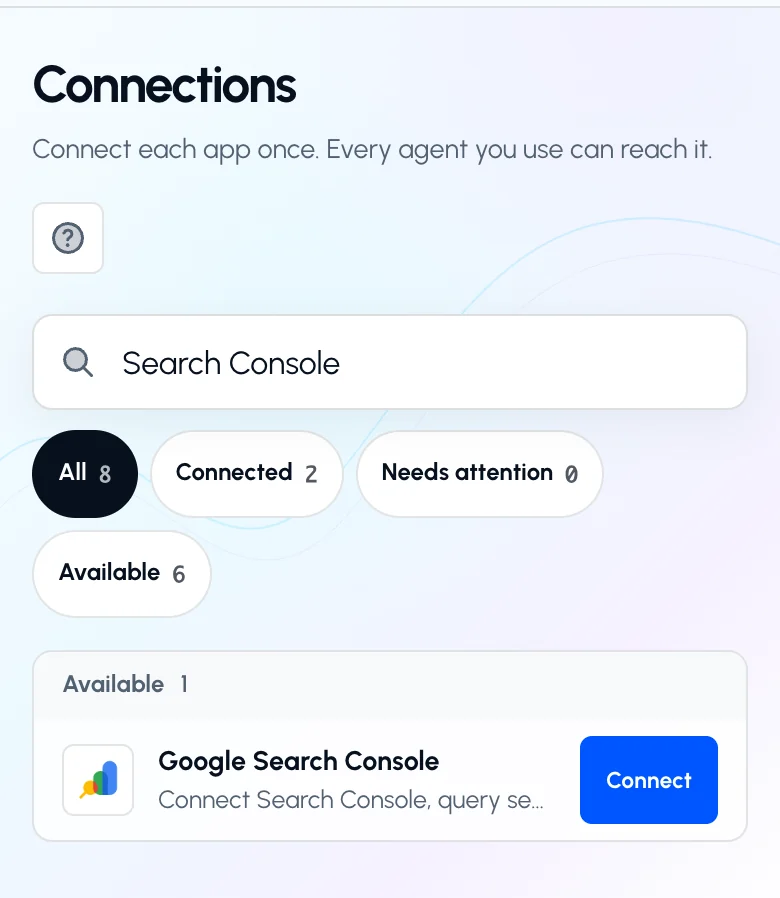
Search Connections for Search Console and choose Connect on the Google Search Console row.Open full-size image (opens in a new tab) - Choose the right Google account. Use the account that can already access your site in Search Console. Review the Google consent screen and continue back to ApexGenius.
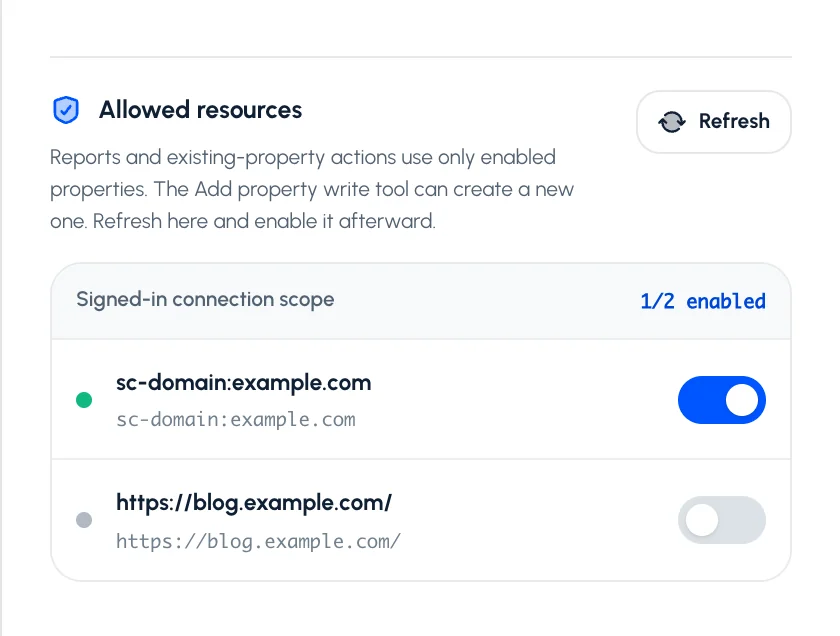
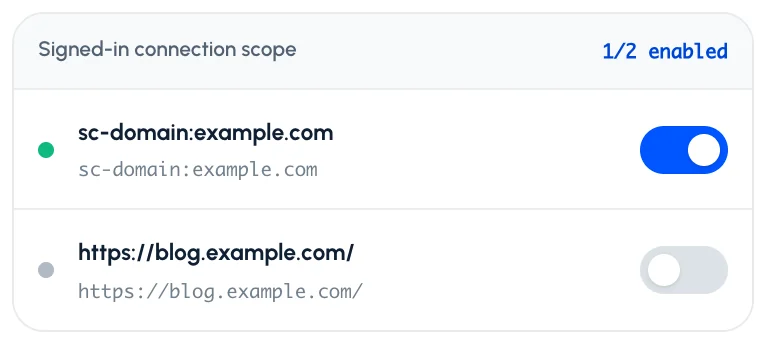
- Enable your Search Console property. Find Allowed resources on the connection page or its Tools tab and choose Refresh. Turn on the exact property you want to use. A Domain property and a URL-prefix property are separate choices.
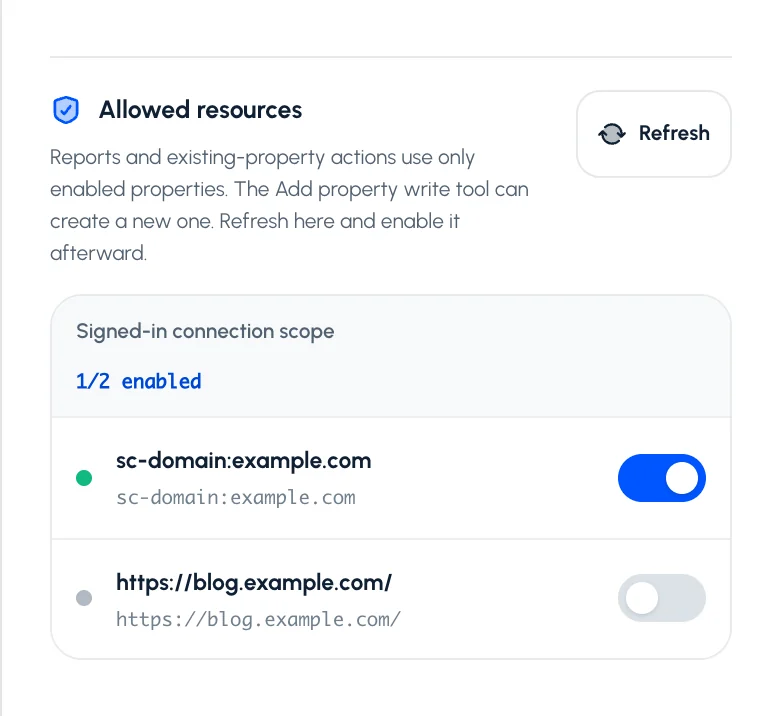
On the Tools tab, open Settings. Under Allowed resources, choose Refresh to find the properties the signed-in Google account can reach.Open full-size image (opens in a new tab) 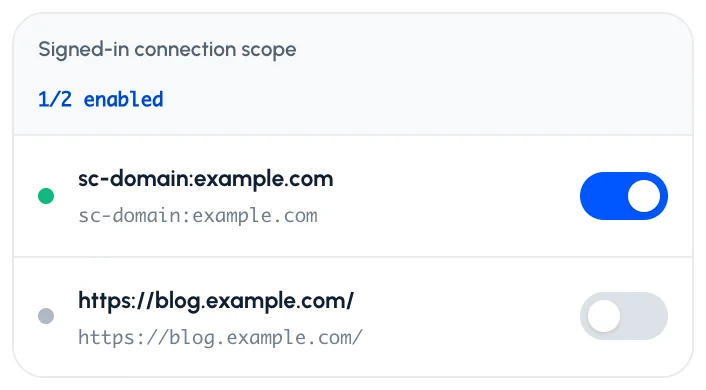
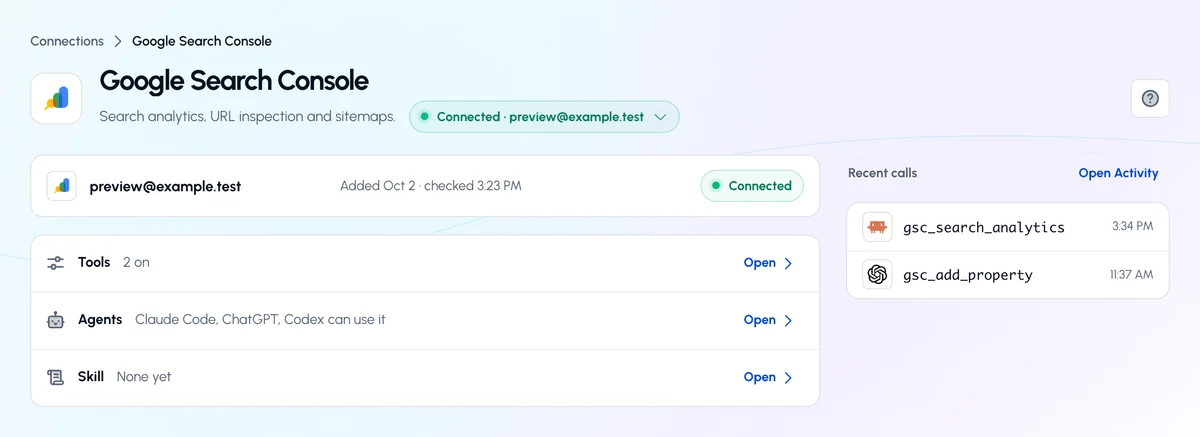
Turn on the property you want your AI to use. This capture shows a sample property; choose your own.Open full-size image (opens in a new tab) - Check the connection and tools. Use Test connection and review the Read tools. Search performance, property details, sitemap details, and URL inspection are reads. Keep property and sitemap changes off if you only need reporting.
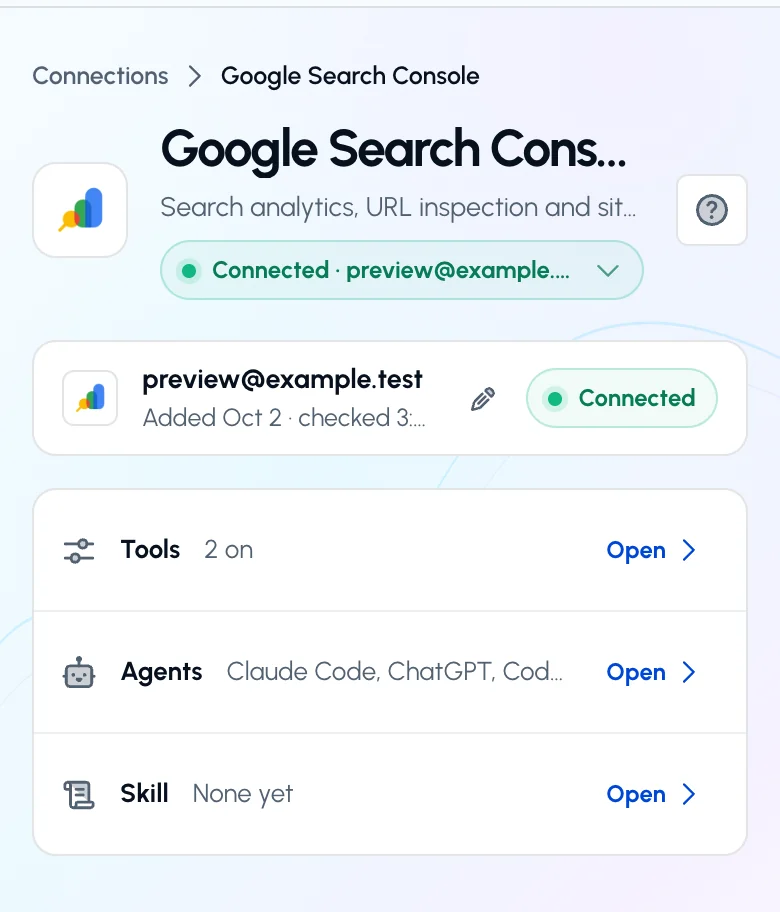
The Google Search Console page after you connect. The status control reads Connected and the account row shows when it was last checked. Open the status control for Check again.Open full-size image (opens in a new tab)
2. Connect ApexGenius to Muse
Use this server address when adding the connection:
https://server.autom8.pro/mcpThe steps are above, under Add the ApexGenius connector to Muse. These notes apply to Muse only.
- Why the prompt is long. Muse’s custom connector asks for the sign-in addresses up front instead of reading them from the MCP address. The Muse setup prompt carries the authorize, token and registration addresses. No client ID or secret is needed.
- Access. When ApexGenius asks what Muse may use, choose Read only for the first test, or Custom to limit it to the tools you need.
3. Verify one safe read
List the Google Search Console properties enabled for me in ApexGenius. Do not change anything.
List the Google Search Console properties enabled for me in ApexGenius. Do not change anything.Confirm that the returned property matches the one you enabled. Then ask for its ten pages with the most clicks over a specific date range. Compare the property, dates, search type, clicks, and impressions with the Search Console Performance report.
Full guide: the Google Search Console setup guide.
What it looks like in Muse
Illustration of a task, not a recorded customer result. Your answers come from the account and dates you choose.
apex_search_toolsGoogle Search Console properties · Find Search Console property accessCompleteapex_call_read_toolgoogle_search_console_list_properties · List enabled propertiesCompleteapex_call_read_toolgoogle_search_console_get_property · Check the selected property’s permission levelCompleteExample: sc-domain:example.com is enabled. Confirm that this is the site you want before requesting a report. Nothing was changed.
Read-only routeWhat to ask Muse about Google Search Console
- Choose a property
Which Google Search Console properties have I enabled in ApexGenius?
Runs
google_search_console_list_properties(read), thengoogle_search_console_get_property(read). - Analyze performance
Compare clicks and impressions for my selected property over the last two complete 28-day periods. Which pages gained or lost the most clicks?
Runs
google_search_console_query(read). - Find query opportunities
Find queries with high impressions and low CTR for my selected property. Show their pages and average positions, then suggest what to review.
Runs
google_search_console_query(read). - Inspect a URL
Inspect a URL I provide in my enabled Search Console property. Do not submit it for indexing.
Runs
google_search_console_inspect_url(read). - Review sitemaps
List the sitemaps submitted for my selected property and summarize reported errors, warnings, and last download dates. Do not change anything.
Runs
google_search_console_list_sitemaps(read), thengoogle_search_console_get_sitemap(read).
These 5 questions use 6 of Google Search Console’s 11 operations. The full list is below.
- Which Search Console properties have I enabled in ApexGenius? Help me choose the right Domain or URL-prefix property. (read)
- Inspect a URL I provide and explain the index status Google reports. Do not submit anything. (read)
- List the sitemaps submitted for my selected property and summarize any reported errors, warnings, and last download dates. Do not change anything. (read)
What Muse can do in Google Search Console
11 operations: 6 read, 5 write. Read looks things up and changes nothing. Writes change Google Search Console and run only when you turn them on.
Search Console operations
6 read · 5 writegoogle_search_console_list_propertiesreadList current Google properties enabled for MCP in ApexGenius, with their permission levels.
google_search_console_get_propertyreadRead the exact property URL and Google permission level for an enabled property.
google_search_console_add_propertywriteAdd a Domain or URL-prefix property to the connected Google account. Does not verify ownership or enable ApexGenius access. Refresh Allowed resources and select the new property afterward.
google_search_console_delete_propertywriteRemove an enabled property from the connected Google account and disable its ApexGenius access. Does not delete the website. Confirm the exact property before removal.
google_search_console_queryreadQuery search performance with dimensions, filters, pagination, aggregation, and final, fresh, or hourly data. Recent data can be incomplete.
google_search_console_inspect_urlreadInspect Google index status for a URL in an enabled property.
google_search_console_list_sitemapsreadList submitted sitemaps for an enabled property, optionally within a sitemap index.
google_search_console_get_sitemapreadRead a submitted sitemap’s status, errors, warnings, and content counts.
google_search_console_submit_sitemapwriteSubmit a sitemap for an enabled property.
google_search_console_delete_sitemapwriteDelete a submitted sitemap from an enabled property.
google_search_console_requestwriteCall a property-relative Search Console v3 endpoint for an enabled property. Prefer the named tools for adding properties and inspecting URLs.
You choose the access. When you approve Muse, pick Full access, Read only, or Custom.
Only properties accessible to the Google account and enabled in ApexGenius can be queried.
Use Read only when authorizing your AI client if you only need search reporting and URL inspection.
Compare the selected property, dates, search type, and returned metrics with Search Console before making a decision.
Adding or removing properties and changing sitemaps require Google write permission and allowed write tools. Adding a property does not verify ownership or enable it in ApexGenius.
Questions about connecting Muse to Google Search Console
Updated November 12, 2026.
How do I connect Muse to Google Search Console?
Connect Muse to Google Search Console through ApexGenius in three steps. Sign in to ApexGenius and connect Google Search Console by signing in with Google and enabling your property. In Muse, ask it to connect ApexGenius, paste the Muse setup prompt from ApexGenius, and choose Connect on the connector card. Then open a task in Muse and ask a question about your Google Search Console. Start with a read, so nothing changes.
How do I check that Muse can use Google Search Console?
Ask Muse which apps are connected through ApexGenius. It calls apex_search_tools and lists them, and Google Search Console should be there. If Muse shows the ApexGenius connector card again, choose Connect and finish the browser sign-in. Then ask: “List the Google Search Console properties enabled for me in ApexGenius. Do not change anything.”
Is there a Google Search Console MCP server for Muse?
Yes. ApexGenius is an MCP server that Muse connects to once. It carries your Google Search Console connection and 11 Google Search Console operations, so Muse does not need a separate Google Search Console integration or plugin. You set it up one time and add each agent the same way.
What can Muse do in Google Search Console once it is connected?
Muse can run 11 Google Search Console operations through ApexGenius: 6 reads that list properties, query search performance, inspect URLs and list sitemaps, and 5 writes that add or delete properties and sitemaps, plus a general request tool, once you allow writes.
Can Muse read my Search Console properties?
Only properties the Google account can access and you enable in ApexGenius. Domain and URL-prefix properties are separate choices, so enable the exact one. Check the returned property, dates and search type against Search Console before you decide anything. Adding a property is a separate write.
Can Muse change my Google Search Console?
Not unless you turn on write tools. Search analytics and URL inspection are read only, and they do not request indexing or edit your website. Property and sitemap changes are separate writes you can leave disabled. Adding a property does not verify ownership.
Can I use the same Google Search Console connection with Claude, ChatGPT or Grok Bot?
Yes. One Google Search Console connection in ApexGenius works with every compatible agent you add, including Claude, ChatGPT or Grok Bot. Each agent gets its own access choice and its own short setup, so you can pick read only for one agent and more for another.
More connections like this one
Muse with other apps
 ChatGPT Ads
 Semrush
 Google Ads
 Google Analytics
 Blotato
 Bing Webmaster
 YouTube
All 48 apps Muse can use
 TypeSafe
 Supabase
 Mobbin
 Cal.com
 Slack
 Discord
 GitHub
 Stripe
 Context.dev
 Attio
 Notion
 Apify
 Linear
 Jira
 HQ Rental
 Google Forms
 Google Meet
 Google Tasks
 Gmail
 Google Calendar
 Google Chat
 Google Docs
 Google Drive
 Google Sheets
 Google Slides
 Apollo
 Calendly
 ClickUp
 monday.com
 Atlassian Rovo
 Polymarket
 OP.GG
 Salesforce
 n8n
 Confluence
 ElevenLabs
 FreshBooks
 Trello
 GitLab
 HubSpot
 Claude
 Grok Bot
Connect Google Search Console to Muse today
Start free1,000 free credits. No card required. Disconnect any time.