


Connect Muse to ClickUp
Connect Muse to ClickUp in 3 steps: 1. Sign in to ApexGenius and connect ClickUp. 2. Add the ApexGenius connector. 3. Start using ClickUp in Muse.
1,000 free credits · No card required
How to connect ClickUp to Muse
- 1Sign in to ApexGenius and connect ClickUp
- 2Add the ApexGenius connector to Muse
- 3Start using ClickUp in Muse
- 1
Connect ClickUp to ApexGenius
Connect ClickUp
ClickUp opens its own sign-in. Sign in and allow ApexGenius.
- 2
Connect ApexGenius to Muse
Choose Muse
Back on Start, pick Muse and copy the prompt.
- 3
Add it in Muse
In Muse, ask it to connect ApexGenius. Choose Connect on the card.
- 4
Approve access
ApexGenius opens its approval page. Review the access, then approve.
Add the ApexGenius connector to Muse
Muse adds ApexGenius as a custom connector from inside a chat. There is no config file and no terminal step.
- In ApexGenius, pick Muse on Start and copy the Muse setup prompt.
- In Muse, ask it to connect ApexGenius and paste the prompt. Muse shows an ApexGenius connector card. Choose Connect.
- Sign in to ApexGenius in your browser and approve access.
The MCP address
https://server.autom8.pro/mcp
Check it. Ask Muse which apps are connected. The setup prompt tells it to call apex_search_tools with an empty query and list them.
Then ask Muse
Show the spaces, folders and lists in my connected ClickUp workspace. Do not create or change anything.
Written setup, step by stepShow
Before you start
- An account with permission to use the ClickUp resources you intend to connect.
1. Connect ClickUp to ApexGenius
- Open ClickUp in Connections. Choose Connect, or Add connection when offered. Give the connection a name if prompted. If Gateway setup pending appears, contact ApexGenius support before continuing.
- Choose the account and review access. Sign in to ClickUp in the browser and choose the workspace to allow if ClickUp asks. ClickUp uses browser authorization; no API key is pasted into ApexGenius.
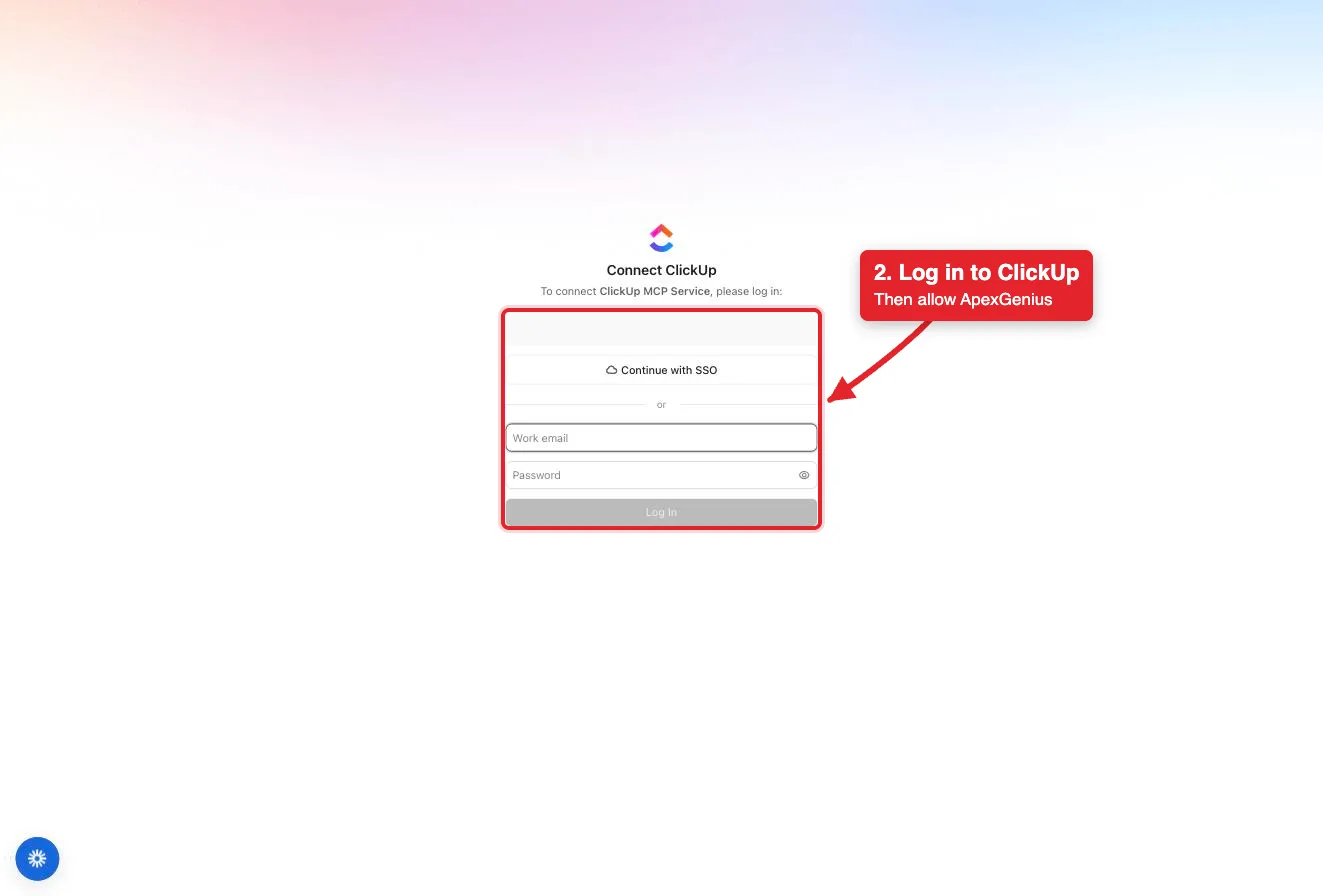
Connect opens ClickUp's login for the ClickUp MCP Service. Log in with SSO or your work email, then allow ApexGenius.Open full-size image (opens in a new tab) - Review the connected account and resources. Confirm the connected ClickUp account and workspace. Open Tools to review the task, list, doc, chat and time tools. ClickUp limits MCP calls per day by plan.
- Check the connection. Use Test connection or Check again and read the reported status. Add an AI agent from the AI agents page, choose Read only for the first test, and try the question below.
2. Connect ApexGenius to Muse
Use this server address when adding the connection:
https://server.autom8.pro/mcpThe steps are above, under Add the ApexGenius connector to Muse. These notes apply to Muse only.
- Why the prompt is long. Muse’s custom connector asks for the sign-in addresses up front instead of reading them from the MCP address. The Muse setup prompt carries the authorize, token and registration addresses. No client ID or secret is needed.
- Access. When ApexGenius asks what Muse may use, choose Read only for the first test, or Custom to limit it to the tools you need.
3. Verify one safe read
Show the spaces, folders and lists in my connected ClickUp workspace. Do not create or change anything.
Show the spaces, folders and lists in my connected ClickUp workspace. Do not create or change anything.Compare the returned account and resource with ClickUp. Check the connection status separately from the result of the first read.
Full guide: the ClickUp setup guide.
What it looks like in Muse
Illustration of a task, not a recorded customer result. Your answers come from the account and dates you choose.
apex_search_toolsClickUp workspace · Find ClickUp readsCompleteapex_call_read_toolGet Workspace Hierarchy · Read the workspace hierarchyCompleteIllustrative example: the workspace has three spaces, Product, Marketing and Operations. Product holds a Sprint folder with Backlog and Sprint 12 lists. Nothing was changed.
Read-only routeWhat to ask Muse about ClickUp
- Map the workspace
Show the spaces, folders and lists in my ClickUp workspace. Do not change anything.
Runs
Get Workspace Hierarchy(read). - Find a task
Find the task about the login bug and show its status, assignee and due date.
Runs
Search Workspace(read), thenGet Task(read). - Summarize a thread
Summarize the comments on this task and list the action items.
Runs
Get Task Comments(read), thenGet Threaded Replies(read).
These 3 questions use 5 of ClickUp’s 48 operations. The full list is below.
- List the open tasks in the Sprint list with their assignees and due dates. (read)
- Create a task in the list I name, assign it to me, and set the due date for Friday. (write)
What Muse can do in ClickUp
48 operations: 20 read, 28 write. Read looks things up and changes nothing. Writes change ClickUp and run only when you turn them on.
Search
3 readSearch WorkspacereadSearch tasks, lists, folders and docs across the workspace.
Search tasks by task typereadFind tasks of one task type, such as bugs.
Search tasks by tagreadFind tasks that carry a tag.
Tasks
1 read · 6 writeGet TaskreadRead the full details of one task by its ID.
Create TaskwriteCreate a task in a list with name, description, assignees, due date and priority.
Update TaskwriteChange a task's name, description, status, assignees or due date.
Set Custom FieldswriteSet custom field values on a task.
Create Bulk TaskswriteCreate several tasks in one list in one call.
Update Bulk TaskswriteChange status, assignee or due date on many tasks at once.
Delete taskwriteDelete a task or subtask. Restoring it happens in ClickUp itself.
Comments and files
2 read · 2 writeGet Task CommentsreadRead all comments on a task.
Get Threaded RepliesreadRead the replies under one task comment.
Create Task CommentwritePost a comment on a task. An @mention notifies that person.
Attach File to TaskwriteUpload a file and attach it to a task.
Tags, links and moves
8 writeAdd Tag to TaskwriteApply an existing tag to a task.
Remove Tag from TaskwriteRemove a tag from a task.
Add task linkwriteLink two related tasks.
Remove task linkwriteRemove the link between two tasks.
Add dependencywriteMark that one task waits on another.
Remove dependencywriteRemove a dependency between tasks.
Move task to a new ListwriteMove a task to a different home list.
Add task to another ListwriteShow a task in a second list as well.
Spaces, folders and lists
3 read · 5 writeGet Workspace HierarchyreadRead every space, folder and list in the workspace, with IDs.
Get ListreadRead one list, including its statuses.
Get FolderreadRead one folder and the lists inside it.
Create ListwriteCreate a list in a folder or space.
Create List in FolderwriteCreate a list inside a named folder.
Update ListwriteRename a list or change its settings.
Create FolderwriteCreate a folder in a space.
Update FolderwriteRename a folder or change its settings.
Time tracking and status
5 read · 3 writeGet Task Time EntriesreadRead the time logged on one task.
Get time entries for multiple tasksreadRead total time for tasks in a space, folder or list.
Get Current Time EntryreadCheck whether a timer is running and on which task.
Get Time in Status for a taskreadRead how long a task has spent in each status.
Get Time in Status for tasks in a ListreadRead time in status for the tasks in a list.
Start Time TrackingwriteStart a timer on a task for the signed-in user.
Stop Time TrackingwriteStop the running timer.
Add Time EntrywriteLog a block of time on a task.
Members
3 readGet Workspace MembersreadList the members and guests in the workspace.
Find Member by NamereadFind a member by name or email.
Resolve AssigneesreadMatch names to user IDs before assigning a task.
Chat
1 read · 1 writeGet Chat ChannelsreadList the Chat channels in the workspace.
Send Chat MessagewritePost a message to a Chat channel. It is sent at once.
Docs
2 read · 3 writeList Document PagesreadList the pages in a doc.
Get Document PagesreadRead the content of one or more doc pages.
Create DocumentwriteCreate a doc in a space, folder or private docs.
Create Document PagewriteAdd a page or sub-page to a doc.
Update Document PagewriteEdit the content of a doc page.
You choose the access. When you approve Muse, pick Full access, Read only, or Custom.
ClickUp sets the boundary. The connection reaches what the signed-in ClickUp user can reach in the authorized workspace.
Reads use a route that checks ClickUp's own read-only label before every call.
Writes run immediately. Blocked hides a tool from agents.
ClickUp limits MCP calls by plan: without the Everything AI add-on, 50 calls per 24 hours on Free Forever and 300 on Unlimited and above. ClickUp's MCP server is in public beta.
Disconnecting stops future gateway access. It does not undo a task change, comment, chat message or deletion that already ran.
Questions about connecting Muse to ClickUp
Updated November 12, 2026.
How do I connect Muse to ClickUp?
Connect Muse to ClickUp through ApexGenius in three steps. Sign in to ApexGenius and connect ClickUp by signing in to ClickUp in the browser. In Muse, ask it to connect ApexGenius, paste the Muse setup prompt from ApexGenius, and choose Connect on the connector card. Then open a task in Muse and ask a question about your ClickUp. Start with a read, so nothing changes.
How do I check that Muse can use ClickUp?
Ask Muse which apps are connected through ApexGenius. It calls apex_search_tools and lists them, and ClickUp should be there. If Muse shows the ApexGenius connector card again, choose Connect and finish the browser sign-in. Then ask: “Show the spaces, folders and lists in my connected ClickUp workspace. Do not create or change anything.”
Is there a ClickUp MCP server for Muse?
Yes. ApexGenius is an MCP server that Muse connects to once. It carries your ClickUp connection and 48 ClickUp operations, so Muse does not need a separate ClickUp integration or plugin. You set it up one time and add each agent the same way.
What can Muse do in ClickUp once it is connected?
Muse can run 48 ClickUp operations through ApexGenius: 20 reads that search the workspace and read tasks, comments, docs, members, Chat channels and time entries, and 28 writes that create and update tasks, comments, lists, folders, docs and time entries, send Chat messages and delete a task.
Can Muse read my whole ClickUp workspace?
Only what the signed-in ClickUp user can reach in the authorized workspace. ClickUp sets that boundary, and no API key is pasted into ApexGenius. ClickUp also limits MCP calls per day by plan, so check your plan before a big job.
Can Muse change my ClickUp?
Not until you allow writes. Reads go through a route that checks ClickUp’s read-only label. With writes on, they run right away, and comments and Chat messages notify people when posted. Deleting a task is marked destructive. Turn any tool off to block calls.
Can I use the same ClickUp connection with Claude, ChatGPT or Grok Bot?
Yes. One ClickUp connection in ApexGenius works with every compatible agent you add, including Claude, ChatGPT or Grok Bot. Each agent gets its own access choice and its own short setup. The ClickUp skill loads in all of them, so it travels with the connection.
More connections like this one
Muse with other apps
 Supabase
 Cal.com
 GitHub
 Stripe
 Linear
 Jira
 HQ Rental
 Google Forms
All 48 apps Muse can use
 Google Tasks
 Google Calendar
 Google Sheets
 Calendly
 monday.com
 ElevenLabs
 FreshBooks
 Trello
 GitLab
 Mobbin
 Slack
 Discord
 ChatGPT Ads
 Context.dev
 Attio
 Semrush
 Notion
 Apify
 Google Ads
 Google Analytics
 Google Meet
 Gmail
 Google Chat
 Google Docs
 Google Drive
 Google Slides
 Apollo
 Blotato
 Bing Webmaster
 Atlassian Rovo
 Polymarket
 OP.GG
 YouTube
- YouTube Analytics
 Salesforce
 n8n
 Confluence
 Google Search Console
 TypeSafe
 HubSpot
Other agents with ClickUp
 Claude
 Grok Bot
Connect ClickUp to Muse today
Start free1,000 free credits. No card required. Disconnect any time.